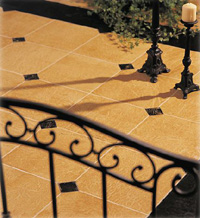
The custom look of inlaid marble transforms concrete into a designer floor.
-
Paint floor with base coat. This colour will be your grout lines. Let dry 48 hours.
-
Measure floor and find the centre point on all sides. Measure and mark grout placement on floor with chalk line. (Note: chalk will wipe off after technique is dry). This will allow evenly sized tiles around the outside. Add border if desired. Tiles shown are 16" squares.
-
Using 1/4" Painter's Tape, tape along the chalk marks. Run your finger along edge of tape just prior to painting. This will ensure a crisp grout line.
-
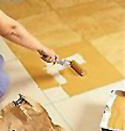
Crumple up pieces of brown paper slightly larger than each of the  squares. Paint tile section with a paint and glaze mixture. Mixture is 2 parts glaze to 1 part paint (more glaze may be added for a softer look). Only paint one tile at a time.
-
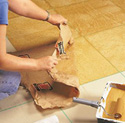
Flatten wrinkled paper over the wet paint mixture. Take an empty roller sleeve and rub in one direction over the entire paper. Alternate the direction on each tile.
-
Remove paper and discard. Only use the paper once. Be careful when  moving on to next tile not to rub previously painted tile. Remove tape. Let dry 24 hours.
-
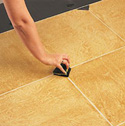
Cut the diamond inlay from a small sponge. Press sponge into contrasting paint. Blot excess paint off with paper towel. Press onto floor where the tiles intersect. Let dry.
-
Use a metallic paint marker and a ruler to outline small diamond inlay.

-
Floor should be top coated with 2 coats of urethane varnish to add durability.
Paint & Tools:
Base Coat: Beauti-Tone 5I3-4
Top Coat: Beauti-Tone 5G3-7
Accent Colour: Black
Tools:
Medium Weight Brown Paper 8955-730, 2 Roller Refills 9" 1655-961, Roller Kit 9" 1656-504, Beauti-Tone Glaze 1824-280/299
Tip:
To handle corners and small spaces crumple a small amount of brown paper in your hand and pull the paint off. Handle corners and small areas as you work your way around the room. Cut and crumple enough paper to do the entire floor before starting.