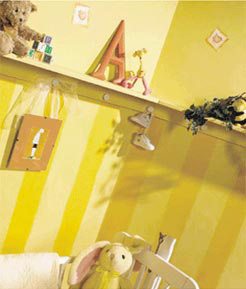
 Decorate the nursery in colours and style that will stimulate learning and play for years to come.
-
Paint wall with desired base colour. Let dry 48 hours.
-
Measure and mark stripe placement on walls with chalk line. The stripe in picture was 5' in height. (Note: chalk will wipe off after technique is dry). Stripe may be any width you desire; 4" to 8" is average. (5" stripe is shown).
-
For stripes, mix 6 parts latex glaze with 1 part latex paint.
-
To give the stripes a playful look, using a 4" foam roller, paint the stripes not going completely to the edge. Soften edge with a slightly dampened rag or stipple brush.
-
Remove tape within 15 minutes after painting. Let stripes dry for 24 hours.
-
Colour wash entire wall with a rag dampened with water and dipped into paint mixture (use same paint as for stripes (6 parts latex glaze and 1 part latex paint)). With a large circular motion apply mixture to top of walls and over striped area. Continue until all of the areas are complete.
Tip:
Stand back and view the area that you are colour washing at intervals to make sure that there is a consistent pattern on the walls.
The little details make the difference (Bird Motif)
Creating your own customized detail is simple. The detail used in this nursery was inspired from the material in the crib. Photocopy the detail you would like to use on the wall. Trace this pattern randomly on the wall using carbon paper. Hand-paint the pattern with the appropriate colours of craft paint and small artist brushes.
Beauti-Tone Paint Colours:
Base Coat: 1T1-5
Stripe Colour: 1T1-3
Bird Motif: 1H1-7, 2D1-8
Materials:
1670-688 Painters Tape, 8212-542 Artist Brushes, 4515-714 Stipple Brush or Magnetic Broom, 1610-867 Lint free Rag, 1656-407 Foam Roller Kit, Carbon Paper